Adding images to the sidebar of your blog or website can really enhance the overall look and feel. It’s a great way to make your site more attractive and highlight any important links or information you want to share with your readers. Today’s tutorial will walk you through how to add an image to your WordPress sidebar.
Adding Images to WordPress Sidebar
If you are running the newest version of WordPress and your design supports blocks in the sidebar (like our WordPress themes!), the whole process is straightforward and similar to creating WordPress posts.
#1 Find your sidebar
All sidebars are located in your WordPress Dashboard. To find them, locate the Appearance tab on the left and click the Widgets tab.
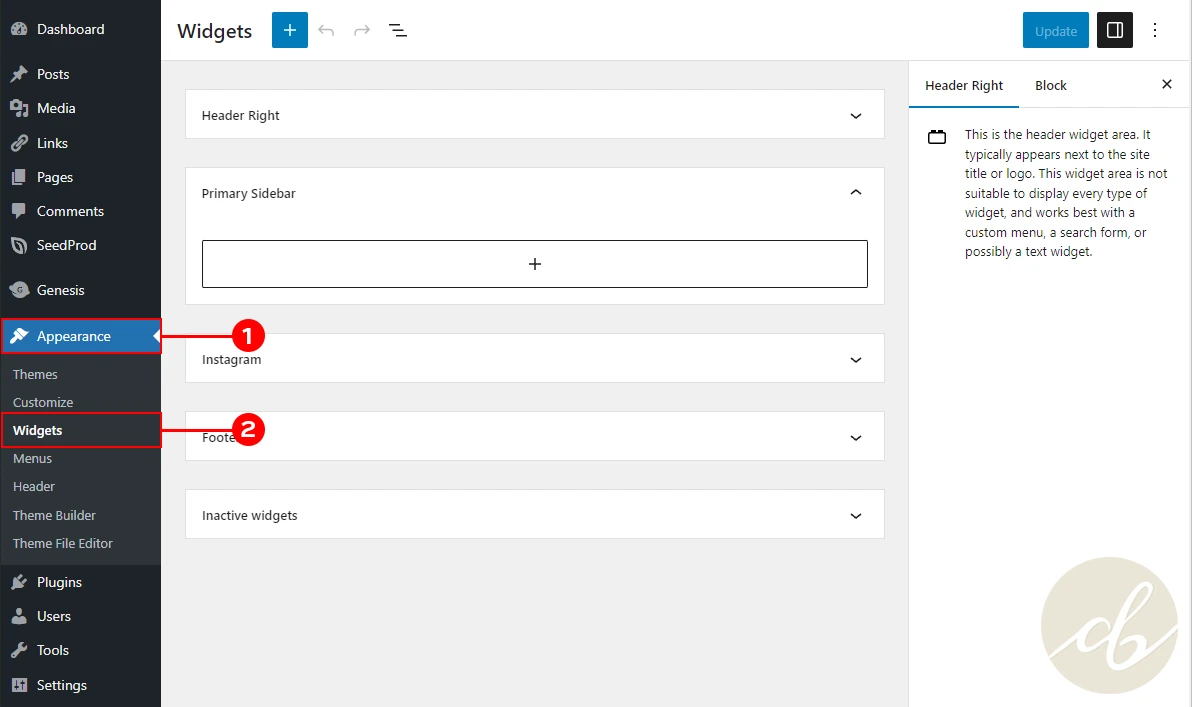
In the Widgets window, you will see all the available sidebars for your design. By default, the Primary Sidebar is the right column of your blog. And just in case you have some widgets that you’re not using right now but think you might want to use them in the future, you can keep them in the inactive widgets tab.
#2 Pick a widget type
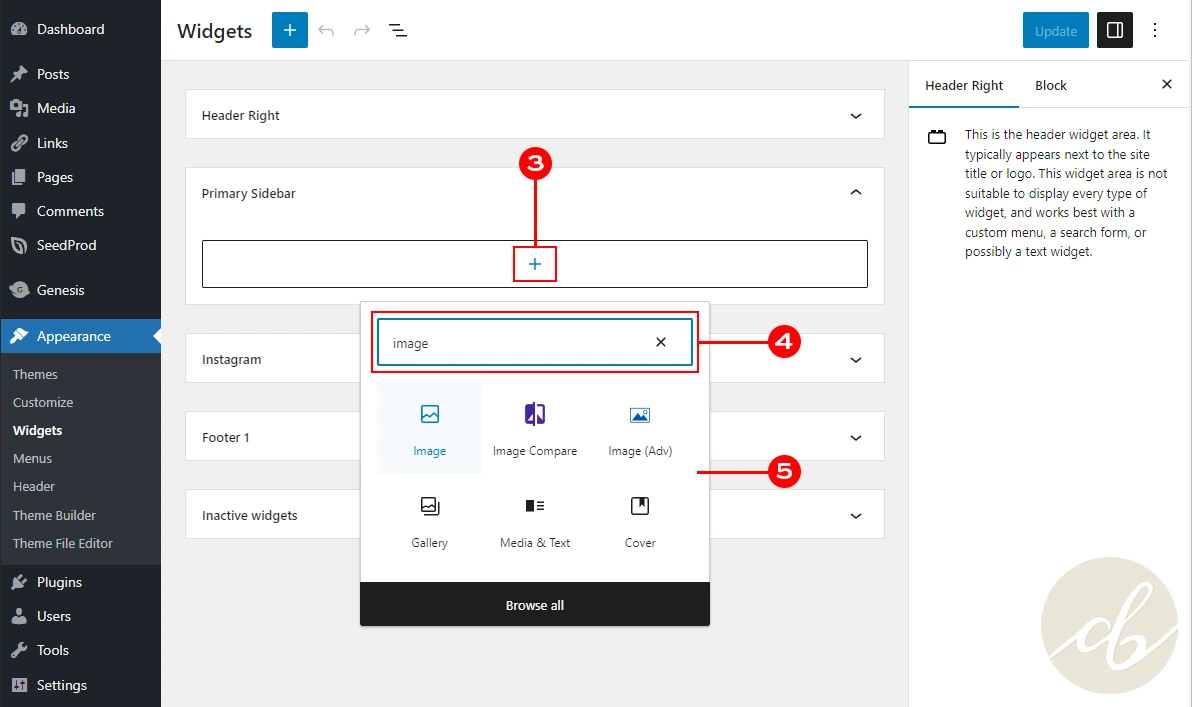
To add an image (or any other widget) click on the plus icon, and from the drop-down menu, choose the widget you need. If you are looking for something specific like the image widget, you can easily find it by using the search bar. And if you want to explore all the options available, just click on “browse all.”
#3 Setup your widget
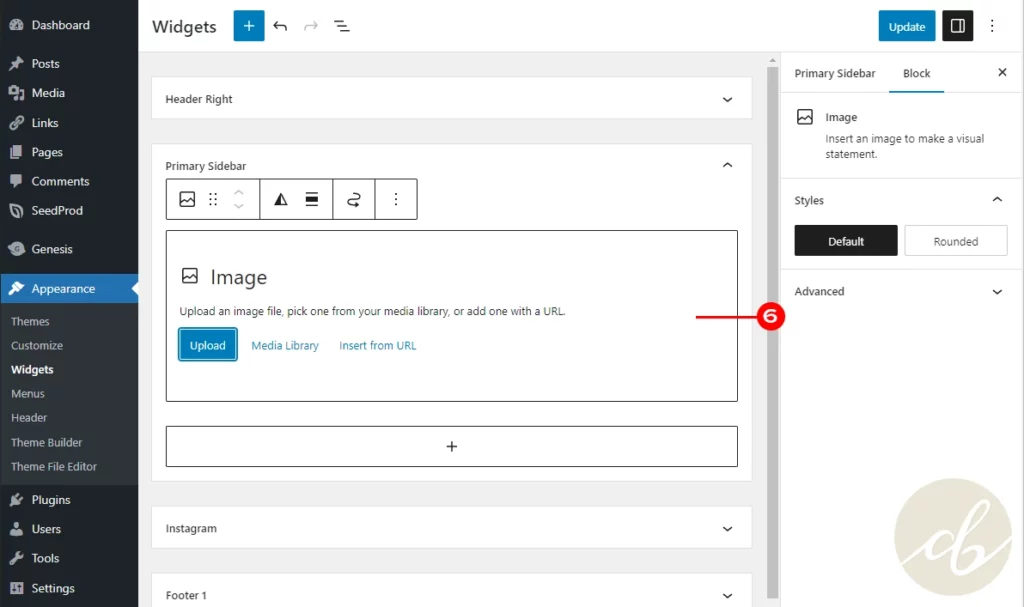
After adding the widget, it’s time to add some content! If you’re using the image widget, it’s super easy. All you have to do is upload an image from your computer or choose one from the media library.
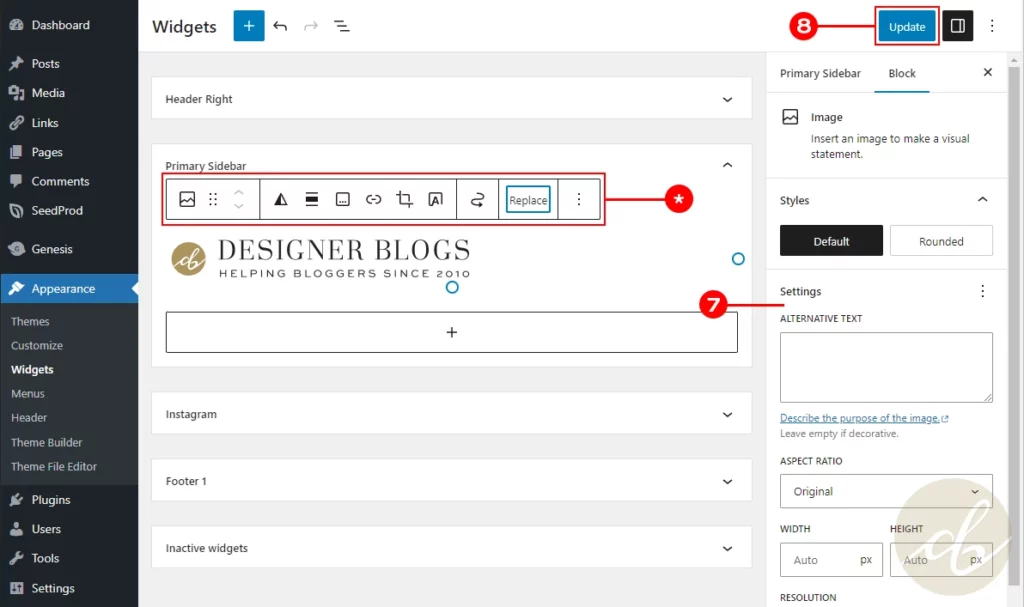
#4 Play with settings and save
Now you can browse all block settings on the right and in the small tool panel above your widget. You will find there: an option to change your image size, add links, change image shape, and more!
Once you are happy with the results, remember to click the Update button in the top right corner.
And that’s all! Your image widget is now added to the sidebar of your choice!
Adding Images to WordPress Sidebar in classic editor
If you haven’t updated to the latest version of WordPress yet (or your design does not support blocks in sidebars), just a heads up that adding content to your sidebar might look a little different. No worries, though, you can still find all your sidebars in the Appearance tab. Just keep in mind that the widget window might have a different look and feel.
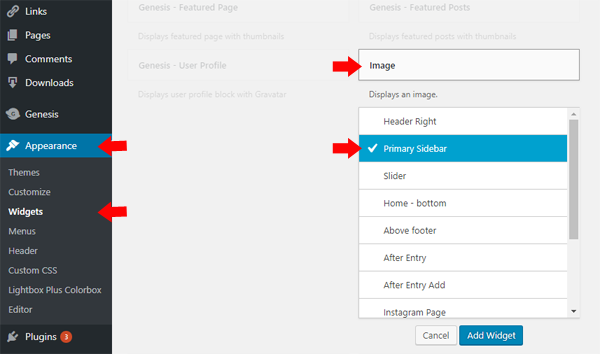
All the widgets will now be listed next to the sidebars, and all you need to do is find the Image widget and click on it. A drop-down will appear, asking you to select where you want the image placed. Click the sidebar of your choice (for the right blog column pick Primary Sidebar) and then click Add Widget.
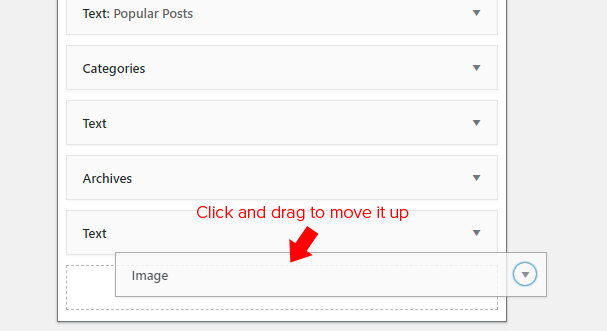
You’ll see that the image widget has now been added to your sidebar. By default, the widget will be added to the bottom of your sidebar. If you wish to reposition the widget, simply click on the image widget and drag it up into the position in your sidebar you want it.
Now you need to add the image you wish to appear on your sidebar, so click on the “No image selected” box to choose your image.
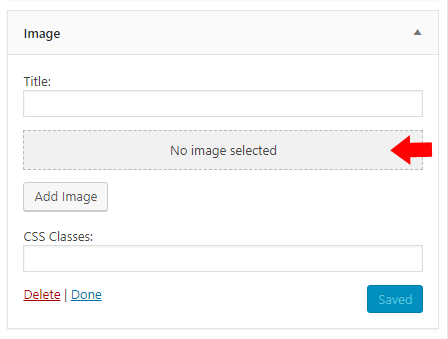
Follow the instructions to upload an image or pick one from the media library. Once your image is visible in the widget, don’t forget to click the save button in the bottom right corner.
Now go to your live site and check out your new sidebar image! If you need to make any changes to the image in the future, you can easily go back to Appearance > Widgets and then find the Image widget in your Primary Sidebar to make your changes.
I hope that now adding images to the WordPress sidebar will be easy. If you have any questions, let me know in the comments.
The post How to Add Images to WordPress Sidebar appeared first on Designer Blogs.
Go to Source
Author: Kate