Unlock the Secret Formula to Crafting Irresistible Blog Posts That Captivate Readers Instantly!
Ever wondered why some bloggers seem to churn out posts that captivate audiences while others struggle to even hit “publish”? Well, the secret sauce often begins with mastering the very first step: creating that initial blog post. Believe me, getting comfy with this foundational move isn’t just a box to tick—it’s the heartbeat of your entire blog. Thankfully, Blogger’s platform makes it surprisingly straightforward, even if you’re stepping into the blogosphere for the very first time. So, ready to stop staring at the blinking cursor and start crafting your story? This ultimate beginner’s tutorial is your trusty guide to navigating Blogger’s dashboard, styling your content with flair, and reaching that glorious “Publish” moment with confidence. Let’s dive in and turn your blogging dreams into clickable realities!
The very first thing every new blogger needs to master is creating a post. Blog posts are the heart and soul of your blog – they are how you share your ideas, stories, and expertise with the world.
Fortunately, Google’s platform makes the process incredibly simple. If you are brand new to the platform, this Blogger tutorial for beginners will walk you through exactly how to create, format, and publish your very first post step-by-step.
Step 1: Access Your Blogger Dashboard
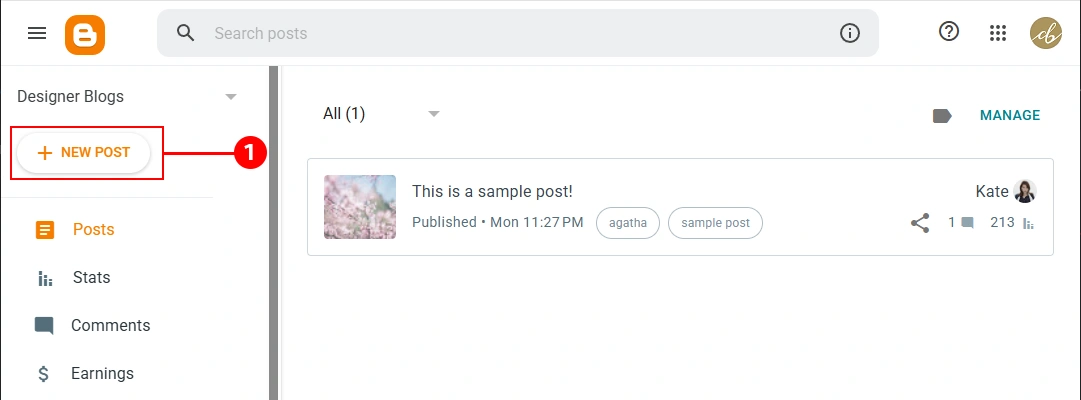
To start learning how to use Blogger, log into your account at Blogger.com.
Once you are on your main dashboard, look at the left-hand menu. Make sure the Posts tab is selected, and then click the New Post button at the top left (look for the orange plus symbol +).
Step 2: Add Your Title and Content
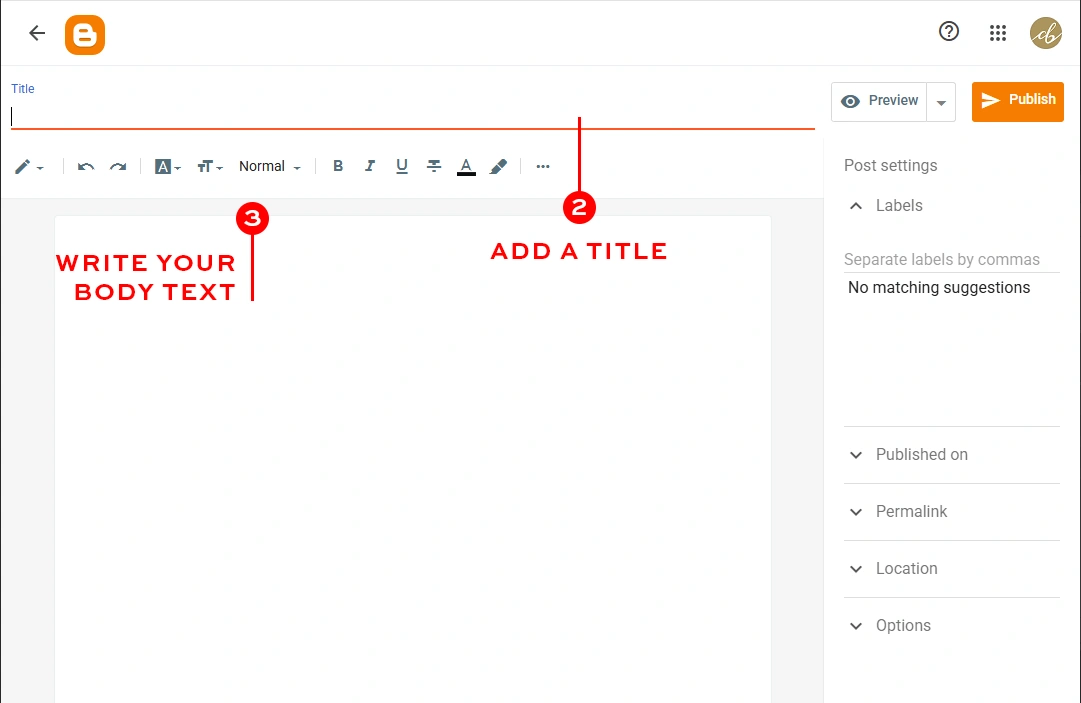
Clicking that button opens Blogger’s clean, distraction-free post editor. Here is where you will build your content:
- Add a Title: At the very top, you will see a field labeled Title. Give your post a catchy, clear name that tells readers exactly what the page is about.
- Write Your Body Text: The large blank area below the title is your workspace. Type or paste your article content here.
Step 3: Format Your Text and Add Media
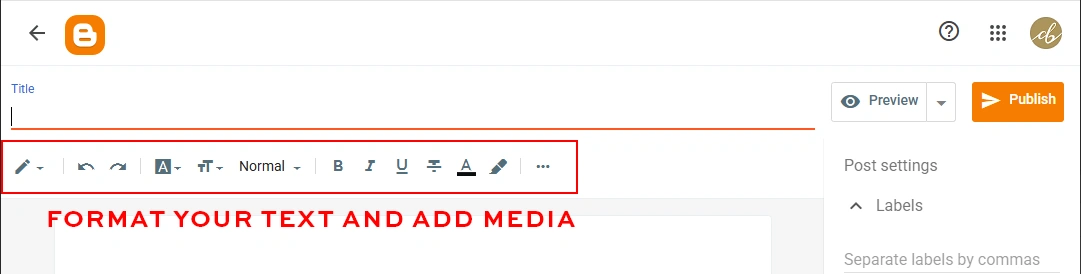
You don’t have to stick to plain text! The toolbar running across the top of the editor gives you all the tools you need to make your post visually appealing:
- Text Formatting: Easily change your font styles, make text bold or italic, adjust font sizes, or change text colors.
- Headings: Use the paragraph dropdown menu to organize your post into Headings and Subheadings. This keeps your text organized and makes it much easier to read.
- Links & Images: Click the chain-link icon to add hyperlinks, or the image icon to upload photos directly from your computer or Google Photos.
- Insert Jump Break: Found on the formatting toolbar, this tool is highly recommended! Inserting a jump break allows you to show just a short snippet or “excerpt” of your post on your blog’s homepage, prompting readers to click a “Read More” button to see the rest.
Step 4: Configure Your Post Settings
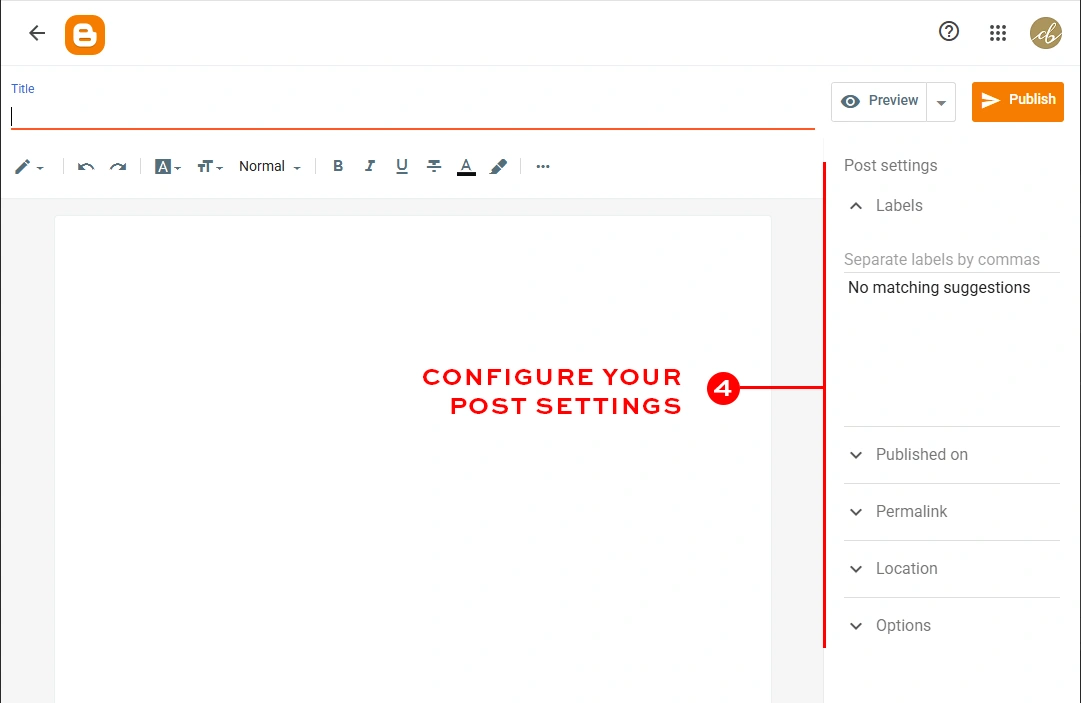
Before you hit publish, take a quick look at the Post Settings panel on the right side of your screen. These options are vital for organizing your blog and helping people find your content on Google:
- Labels: Think of these as categories or tags. Adding labels (like Recipes, Travel, or Blogging Tips) keeps your site organized.
- Published on: You can choose to publish the post immediately, or set a specific date and time to schedule it for later.
- Permalink: Blogger automatically generates a URL path based on your title, but you can choose “Custom Permalink” if you want to shorten it or make it more SEO-friendly.
- Search Description: Don’t skip this! Write a brief, 1–2 sentence summary of your post. This is the snippet of text that people will see when your post shows up in Google search results.
Step 5: Preview and Publish!
When you are finished writing and formatting, click the Preview button (the eye icon at the top right) to see exactly how your post will look to your readers.
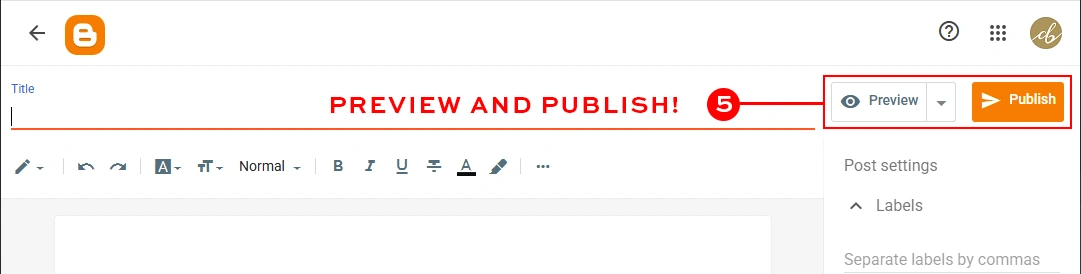
If everything looks perfect, go ahead and click the orange Publish button.
Congratulations! Your new post is officially live on the internet.
We hope this Blogger tutorial for beginners helped you launch your first piece of content! Have any questions about how to use Blogger effectively? Let us know in the comments below!